comments 15

Crackers & Cheese

Homemade olive oil crackers with homemade ricotta cheese
I come from a long line of cracker devotees. My family is famous for its high daily consumption of Huntley & Palmers Cream Crackers. When all six of us lived at home I swear that we ate our way through a whole box every day. We ate other crackers too, but kiwi-made Huntley & Palmers were always king. Most of the time we ate them spread simply with butter and sandwiched together (known as “the double”), but we also loved them topped with a thin slice of cheese and often pickle too.

Olive oil and sea salt crackers

I think I was the most hardcore H&P junkie in my family. I’m not totally sure about that though, so perhaps I shall reveal some secrets as a test. I know that I had the habit in my teenage years of spreading them with peanut butter, then topping them (weirdest of all) with carefully placed rows of roasted peanuts (who knew that double-peanut was a flavour?). I still retain a slight obsession with always putting the topping on the “inside” of the cracker, as in my mind, the “outside” is indicated by the words Huntley & Palmers stamped across it. As a 3 or 4 year old, I apparently objected to my grandfather’s blatant disregard for this unquestionable rule of etiquette, which means that this habit was formed “charmingly” early (did I get it from you Mum?). As a young adult at university I sometimes had to force myself not to buy H&P crackers, as when they were in the house I found it hard to stop eating them for morning tea, lunch and afternoon tea. Even now, when anyone I know is travelling across the Tasman Sea, forget Vogels, forget chocolate fish, I always beg them above all, to tuck a precious box or two of H&Ps in their luggage just for me. (Goodness, the talking cure does work; I feel so much better now all of that’s off my chest.)

Homemade ricotta - Step one: heat milk and buttermilk until the curds separate from the whey

Despite the predominance of cakes and cookies on this blog, my tastebuds swing towards savoury more than sweet. My all time favourite snack is good crackers topped with good cheese. These days I am forced to be more democratic with my cracker consumption (probably a good thing), and I’ve grown an appreciation of how different crackers can enhance different cheeses. One of my favourites is a firm goats cheese with an oat wafer (divine) but I’m also rather partial to homemade olive oil crackers topped with homemade ricotta cheese.

Homemade ricotta - Step 2: strain the curds from the whey

Oh, I hadn’t mentioned that before? Yeah, I make my own cheese and crackers. No big deal.

Freshly strained ricotta
Actually, it’s a pretty major deal. When I stumbled across these recipes on Brandi’s site I was totally gobsmacked for a second – homemade crackers? It was honestly a completely new and thrilling concept for me. That Brandi then topped said crackers with homemade cheese just tipped me over the edge. I’m the kind of person who gets a bit excited about complicated, time consuming recipes (a cake that takes three days to make? I’m in!!), so the workload (and there definitely is work here) didn’t faze me one bit. I had tried other recipes from Brandi’s site and trusted her implicitly. She’s right again – the crackers and cheese are amazing.

Crackers topped with homemade ricotta, honey and black pepper

The crackers are a bit time-consuming, but only during the rolling out and baking stage. The soft, creamy ricotta is the easiest thing ever, and just takes a few hours of patience while it strains. Brandi recommends topping her crackers with the homemade ricotta then a drizzle of runny honey and a grind of black pepper. This is unquestionably delicious, but the crackers are also fantastic with ricotta and smoked salmon or simply with a slice of cheddar. They are also rather good with peanut butter, although extra peanuts are clearly overkill and should not be attempted. Go on, make your own crackers and cheese: impress yourself and wow your friends (revelation of nervous tics optional).
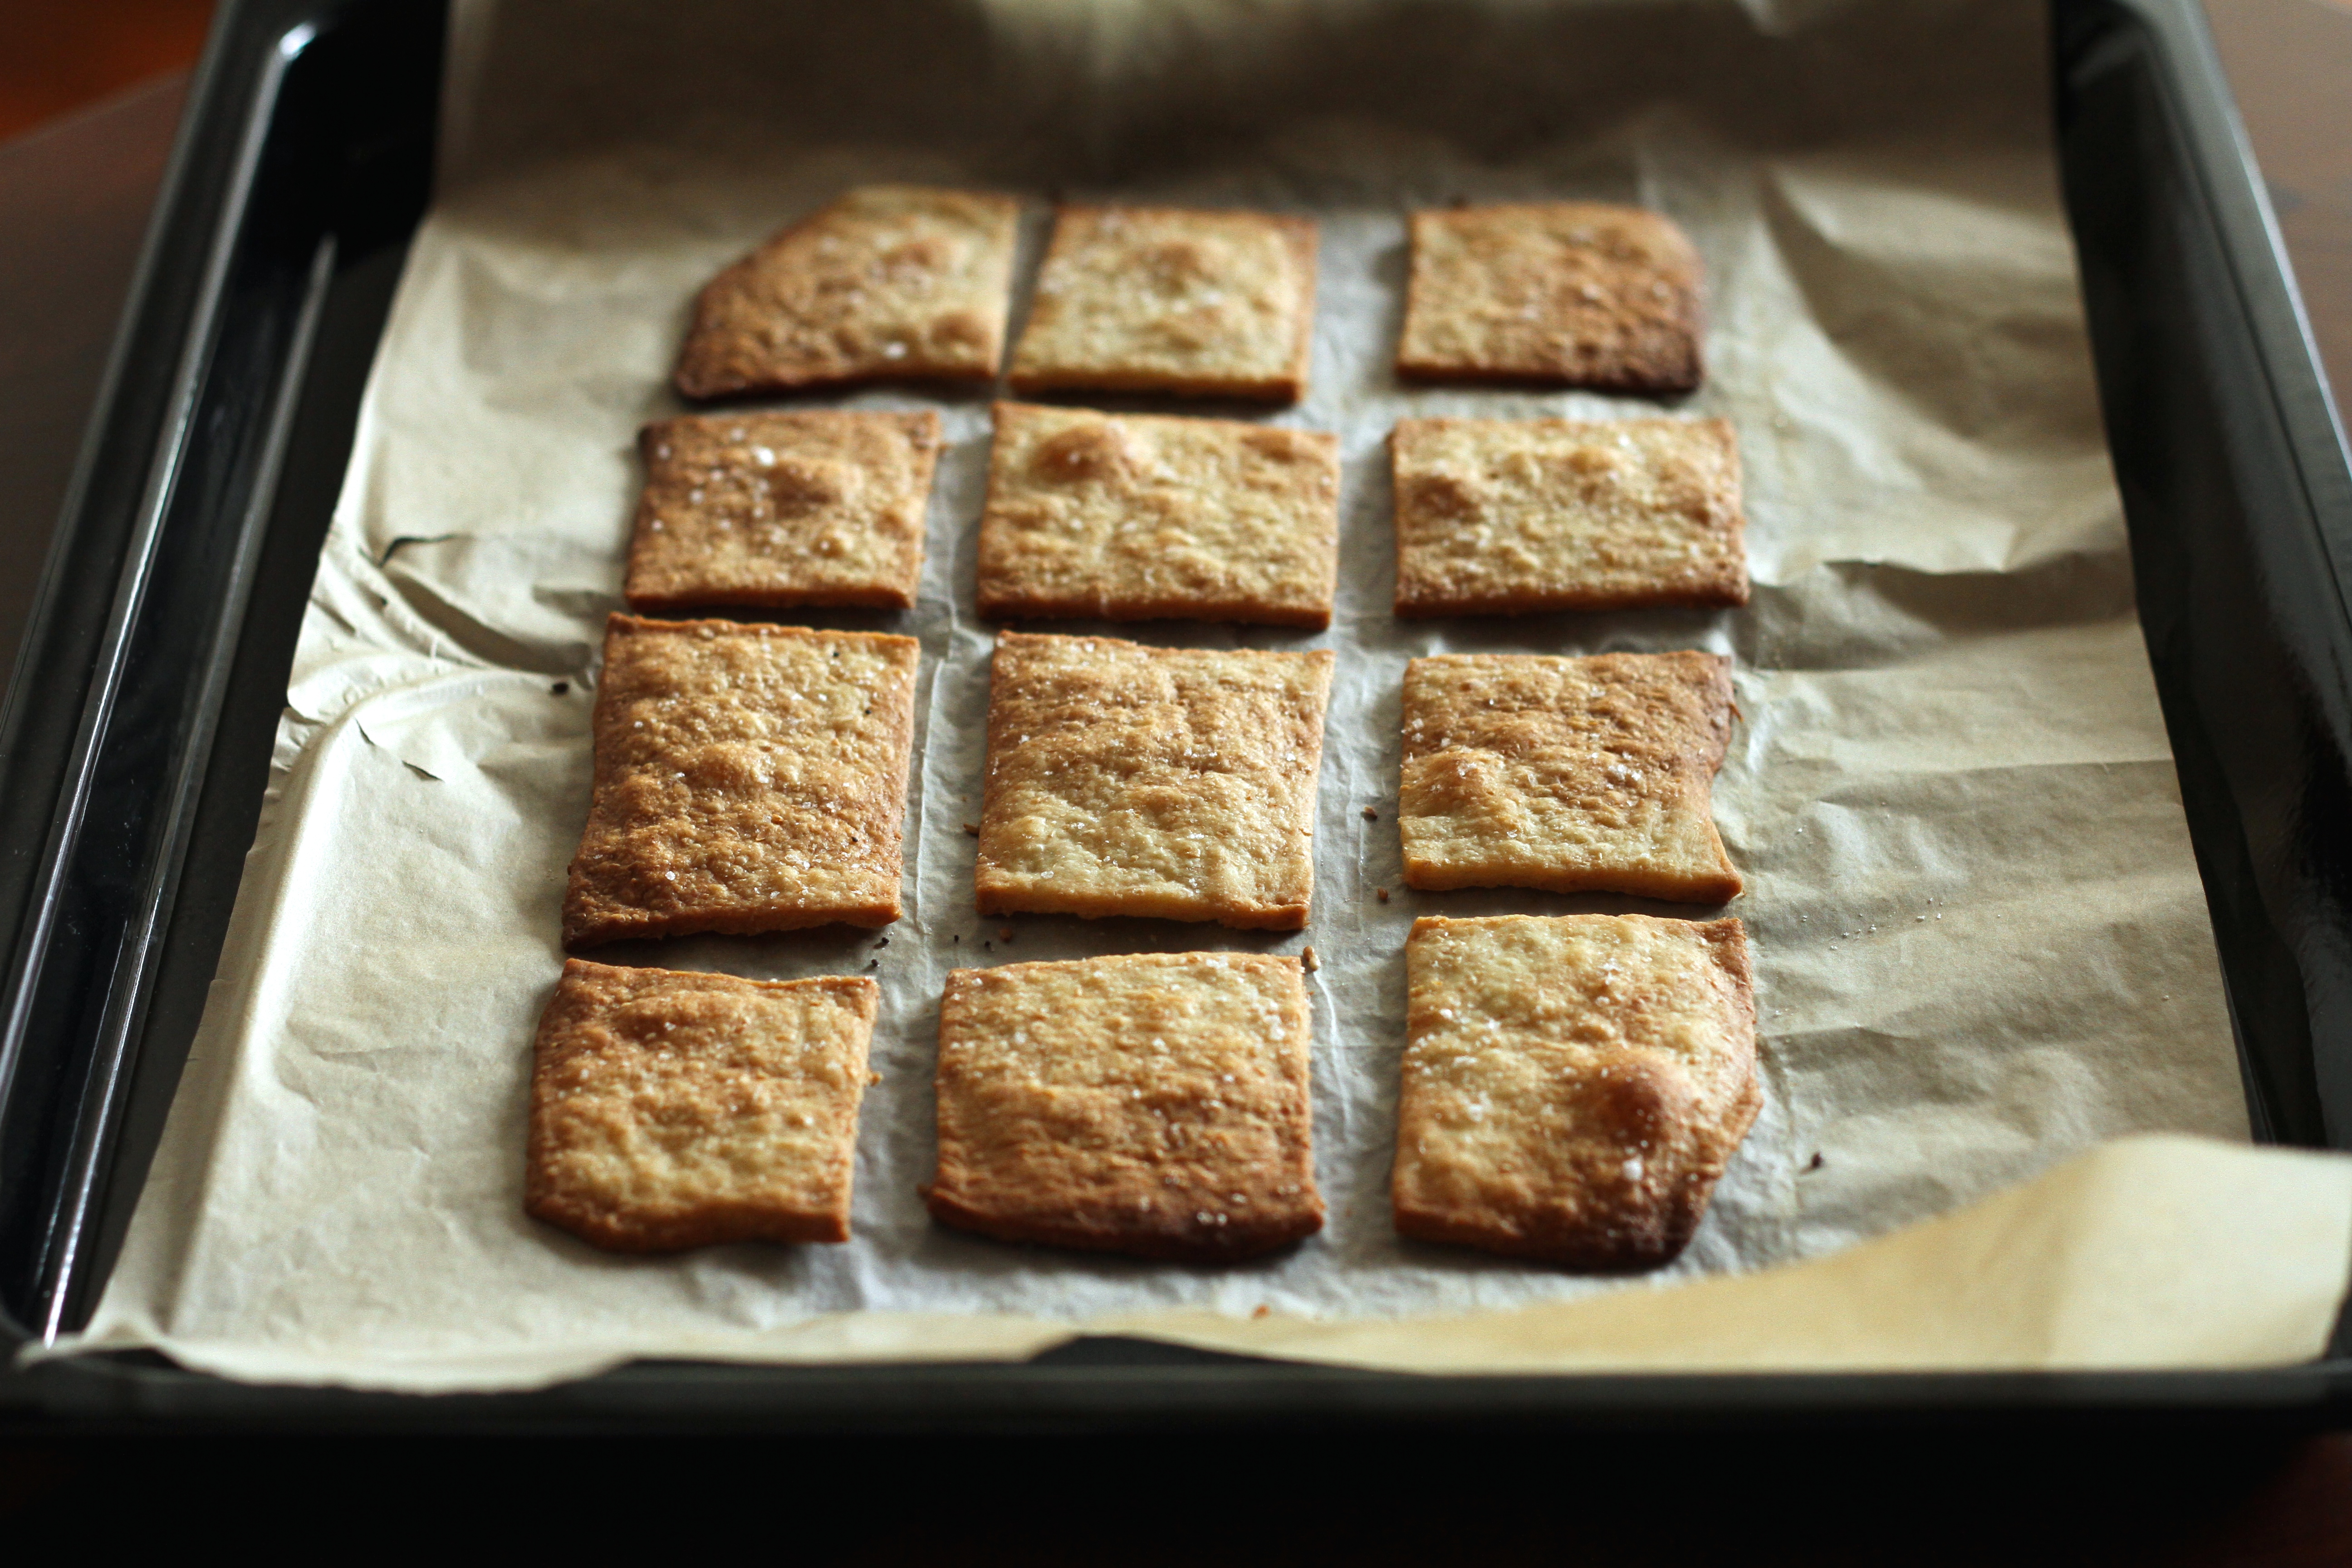
Olive Oil Crackers

  • Servings: makes at least 50 crackers
  • Print
From I Made That!

450g plain flour
190g semolina flour
130g wholemeal flour
2 1/4 tsp salt
1 3/4 cups warm water
3/4 cup olive oil
Extra olive oil, sea salt and seeds for topping crackers

Whisk together the flours and salt in the bowl of cake mixer. Whisk the water and olive oil together and pour into the bowl with the flours. Fit the dough hook to the cake mixer and mix the dough at medium speed for about 5 – 7 minutes, until smooth. The dough should be very soft, but not too tacky. Add a bit more water or flour if needed.

Turn the dough out of the mixing bowl and pat into a large ball. Rub with a little olive oil, then place in a bowl and cover with plastic wrap. Leave to one side for 1 hour at room temperature to relax the gluten.

Preheat your oven to 230°C/440°F, then get to work shaping your crackers. Brandi uses a pasta machine to roll out the dough, but I used a rolling pin instead. Instructions for each method follow:

If using a pasta machine: Cut the dough into equal-sized pieces roughly the size of a billiard ball and flatten. Roll each ball into a flat strip of dough, starting with the widest setting on your pasta machine and working your way up to number 5. Transfer on a sheet of baking paper.

If using a rolling pin: pull off a piece of dough roughly the size of two billiard balls. Working on top of a piece of baking paper, flatten the dough with your palms then roll out as thinly as possible to the size of a large oval.

For both methods, trim the dough to make a large rectangle then slice into squares or rectangles. Brush each cracker lightly with olive oil then sprinkle with sea salt, or a mixture of sea salt and seeds such as poppy, sesame or cumin. Bake until golden, about 5-8 minutes, then transfer to cool on a rack.
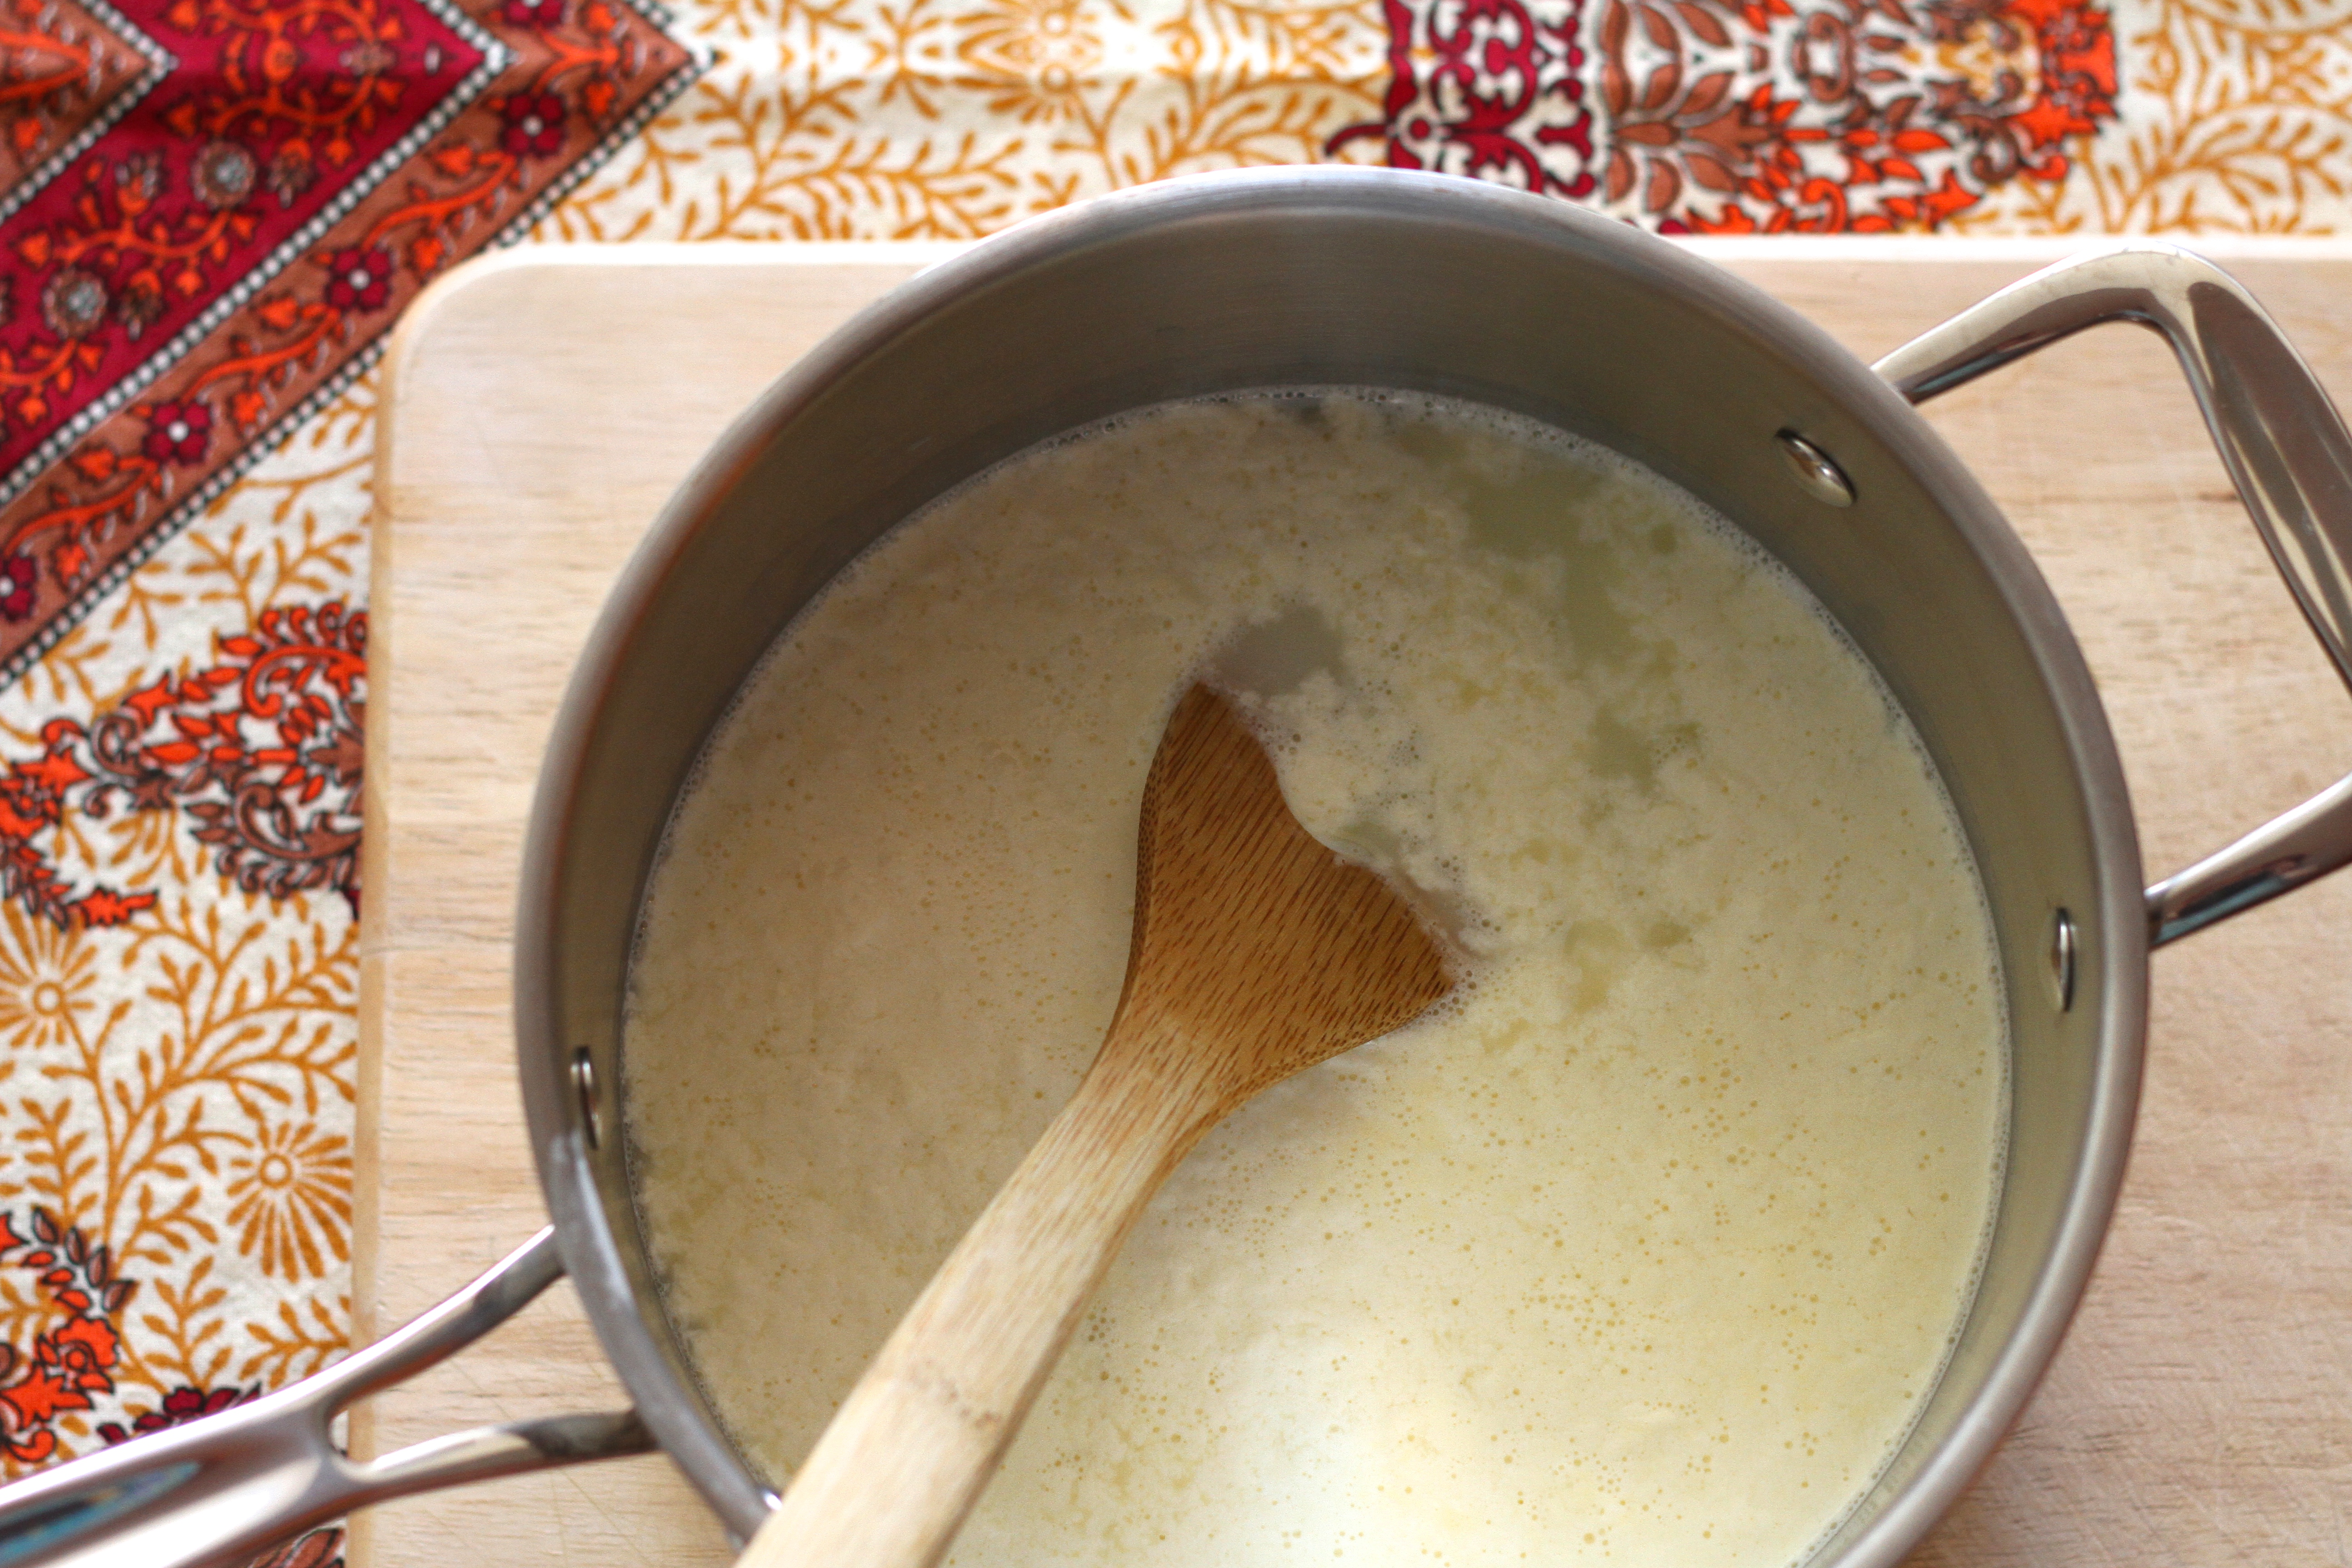
Homemade Ricotta

  • Servings: makes about 2 cups
  • Print
From I Made That!

3 1/4 cups whole milk
3/4 cup cream
1 cup buttermilk
1 tsp salt, or more to taste
Cheesecloth, for straining

Combine the milk, cream and buttermilk in a medium pot and heat slowly over a medium heat. Keep a close watch, stirring very gently now and then, and when the mixture forms curds that separate from the whey, turn off the heat. This took about 10 minutes for me. Let the mixture sit for 30 minutes, as Brandi says, “to help the curds strengthen”.

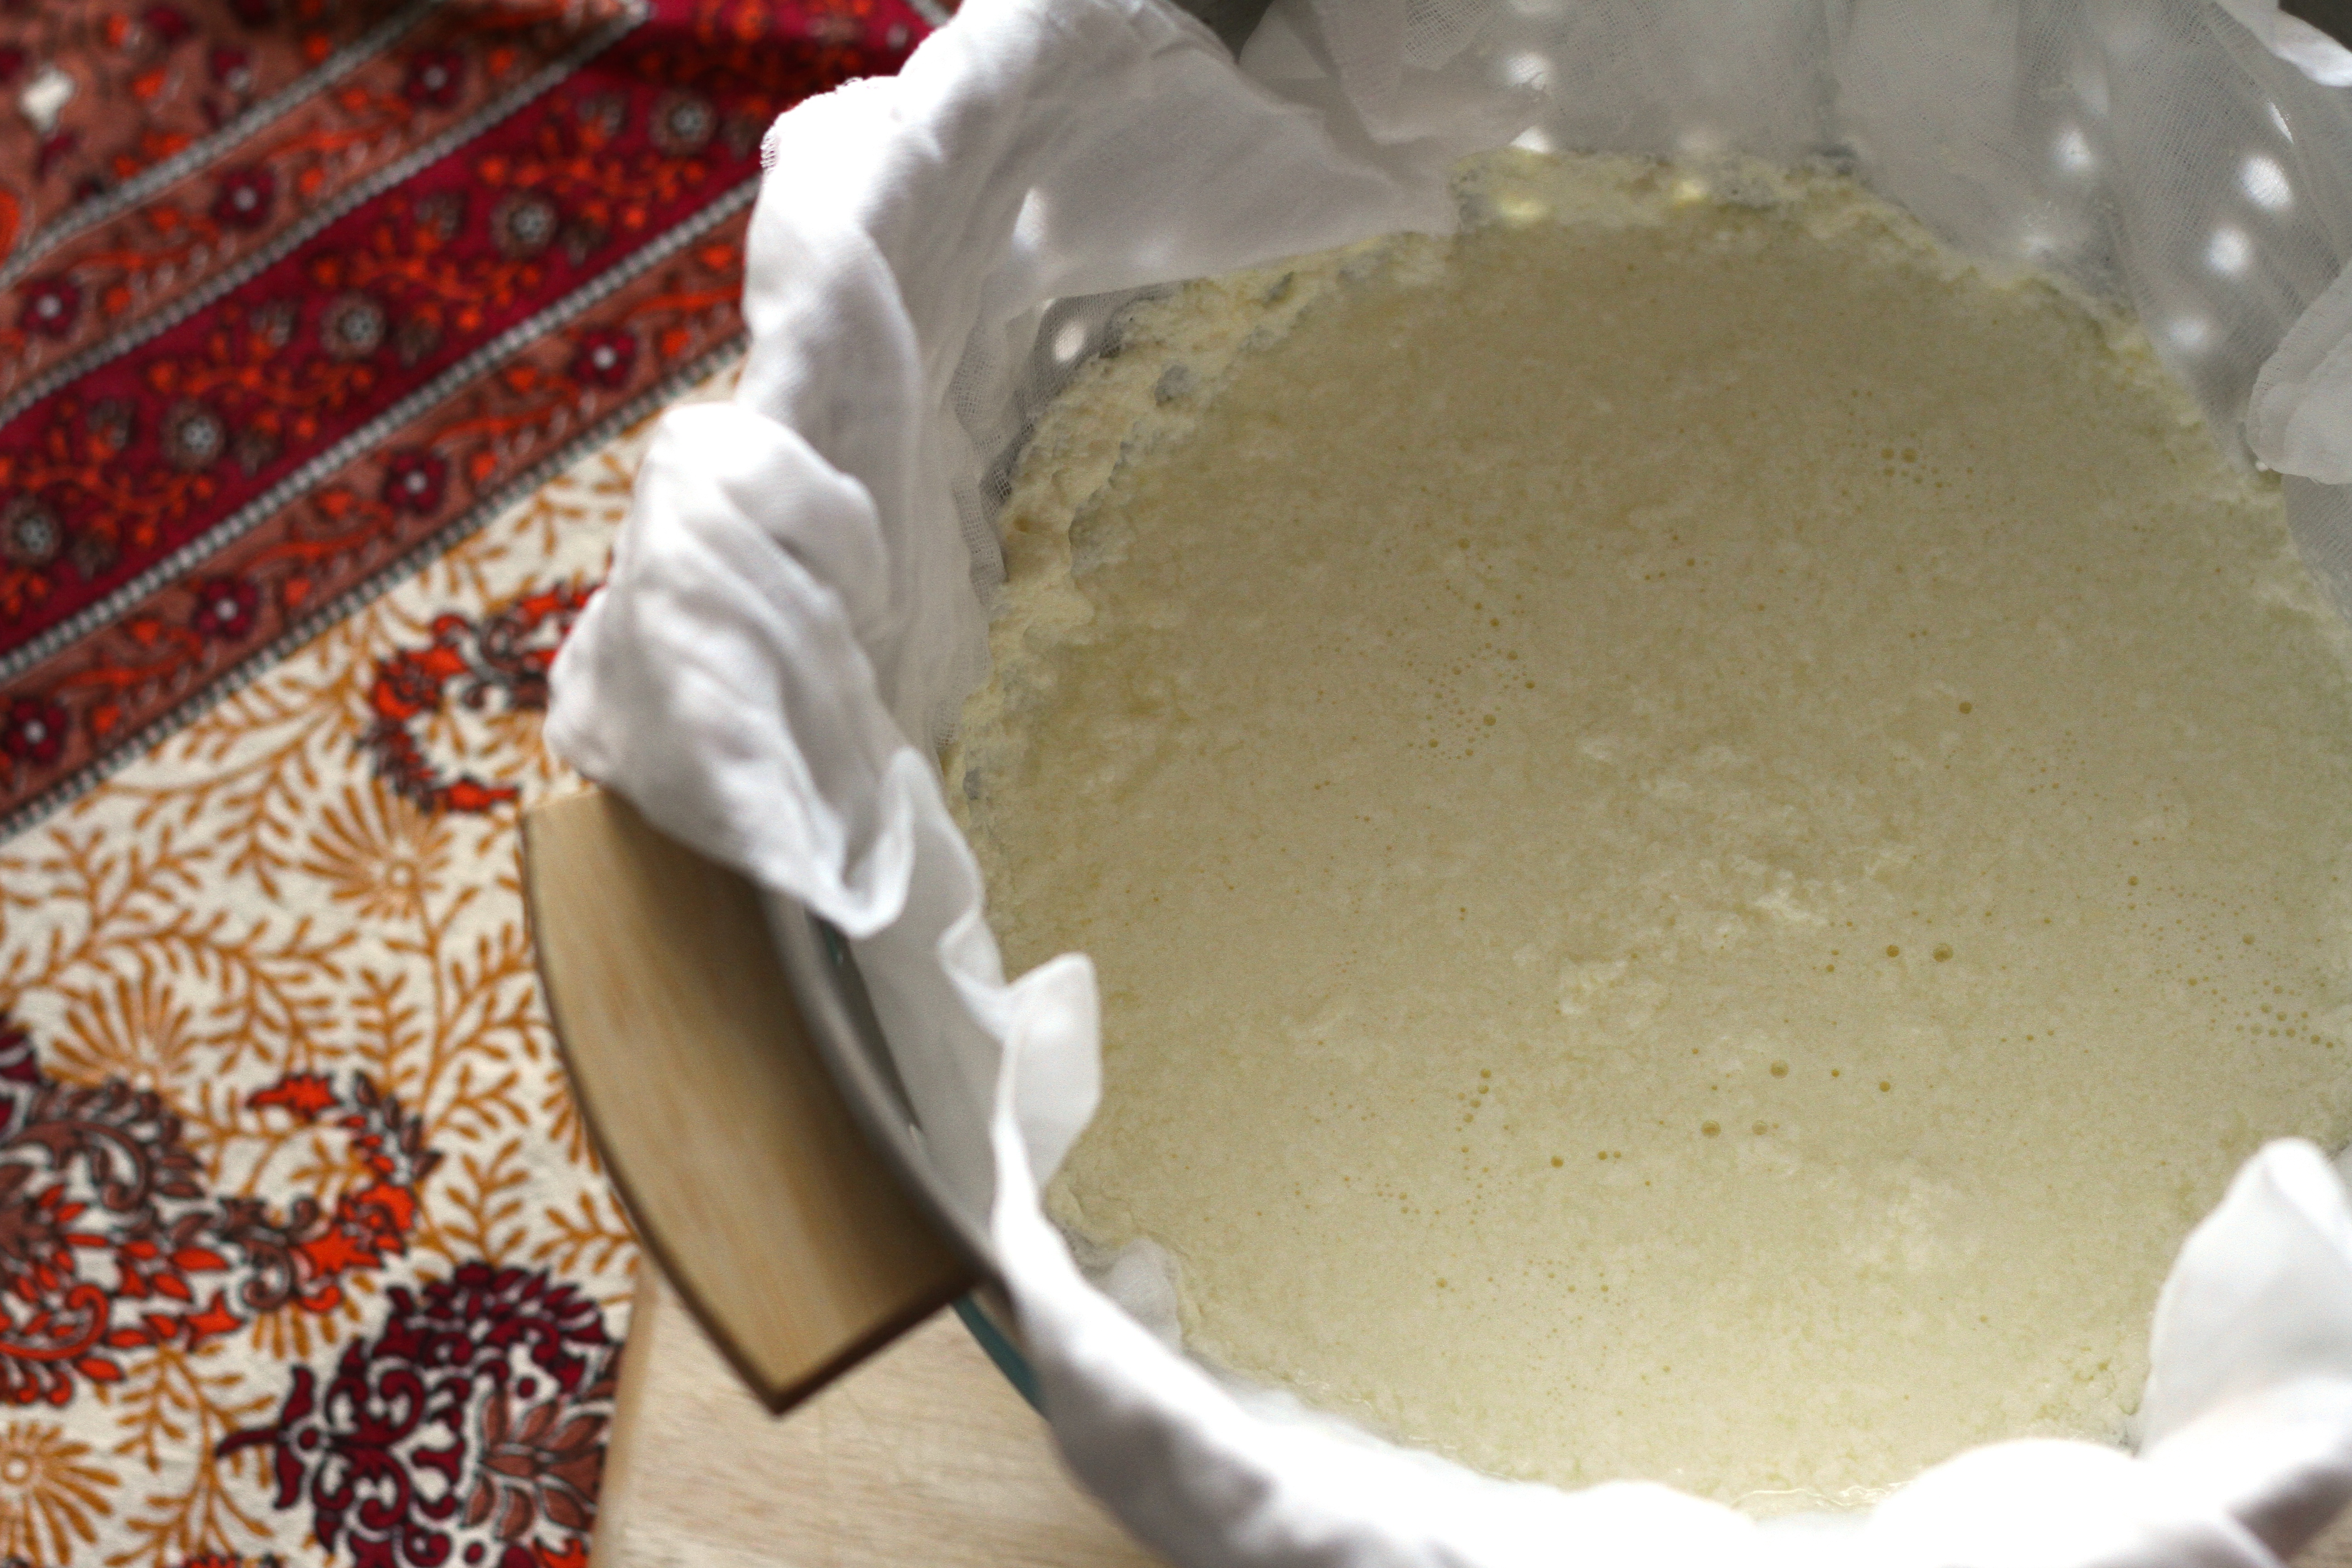
Line a colander or large strainer with 2 layers of cheesecloth and place over a large bowl. Pour the ricotta into the colander and let it strain until the desired consistency is reached. This recipe makes a soft, creamy ricotta, quite unlike the firm, dry, pressed ricotta usually seen in shops. Still, the consistency is directly related to the length of time that it strains. I wanted reasonably firm ricotta that would sit on the crackers and not run off, so I let mine strain for about four hours in the fridge.

Once the ricotta is ready, transfer to a bowl and stir in salt to taste. Ricotta keeps well in the fridge if tightly covered.

Filed under: Eat
comments 23

Apple, Persimmon and Ginger Crumble

IMG_2509

Five members of my family came to stay for two weeks just prior to Easter. This was a much anticipated visit, as it was the first time that Mum, Dad and my youngest sister had been to see us since we had emigrated. Another sister and her husband joined us for the first few days, filling our two-bedroom apartment to the maximum extent possible (which needless to say was delightful!). In the weeks leading up to their arrival, we talked frequently about the weather and what clothes they should bring. I brazenly promised them clear autumn skies, deliciously warm days and a comfortable absence of summer humidity, but what they got was hotter and more humid than the peak of New Zealand summer. With temperatures reaching or exceeding 30°C most days, the air conditioning was in regular use, our supply of ice needed to be constantly replenished, and all the bedding we had bought for our houseful of guests went unused in favour of cotton sheets only (and even then, barely).

IMG_2544

The discomfort of our guests made Colin and I realise just how much we have hardened to the Brisbane heat, but even we have felt like this summer was never going to end. It was late September last year that we first started sleeping with a sheet only – that’s seven months of sticky nights, sweltering days, and flagging energy. Call me ungrateful, but I have been longing for cooler weather – and finally, (hello duvet!) it’s here.

IMG_2522

I made this apple crumble on Easter weekend when I was feeling under the weather and craved something soft and warm. It was still too hot, really, for such a classically wintery dish, but I could sense summer teetering into winter and thought that a crumble might help to magically coax it along. After all, I used to make some variation on apple crumble almost every winter weekend in New Zealand because what could be more cosy than hugging steaming bowls of spicy, appley goodness to our chests while the rain poured down outside? Apple crumble means winter to me in the most deep and meaningful way. It’s restorative powers rival soup, and while eating it I can’t help remembering so many winters past, coming home damp, cold and tired, closing up the house against the dark, thawing out in front of the fire and reading on the couch into the night. I love the warmth of the sun, don’t get me wrong, but it’s the crispness and harshness of winter that makes me truly feel alive.

IMG_2536

I had been planning this crumble for a while, inspired by the bright orange persimmons appearing in the stores alongside the new season’s apples. Normally for apples alone I would use a combination of cloves and cinnamon to spice the mix, but here I elected to use ginger, which pairs nicely with persimmon. The crumble topping itself is informed by my mother’s approach, which involves heavy use of rolled oats and brown sugar and minimal flour and butter. This virtuousness means that the crumble can easily double as breakfast and I always make at least six portions to ensure I have plenty left over for this very purpose. I should also say that this recipe is more of a concept than a script, and the measurements given are really just a guide. It’s hard to go wrong, so as you wish, use more or less fruit, make more or less topping, add more butter and sugar to make it more indulgent, switch the persimmon for frozen blueberries or pear, experiment with different spices, different nuts – you get the idea. The real secret, of course, is that it tastes best on a grey, chilly day, although it’s pretty good too on a warm autumn one when you are only dreaming of, and longing for, rain.

IMG_2545

Apple, Persimmon and Ginger Crumble

4 large tart apples, such as Granny Smith
3 large firm persimmons
2 Tbsp finely chopped crystallised ginger
50g salted butter
3 Tbsp plain flour
1 cup of rolled oats
4 Tbsp brown sugar
1 tsp ground ginger
1/4 tsp ground cinnamon
1/4 cup roughly chopped almonds (optional)

Peel and core the apples and peel the persimmons, then slice the fruit into 1-3mm slices. Don’t be too fussy about uniformity – it’s more interesting to have a mix of smaller pieces that will cook down and disintegrate, and larger pieces that will remain intact to provide a textural contrast. Place the fruit in a medium saucepan, add the chopped crystallised ginger and a dash of water. Cover, bring to a simmer over a medium-low heat and cook until the fruit has softened and is beginning to break up – about 10 minutes. Give the fruit a stir once or twice to ensure the fruit is cooking evenly.

Preheat the oven to 180°C/350°F. While the fruit is cooking, prepare the topping. Place the butter and flour in a medium bowl. Rub the butter into the flour with your fingertips. The ratio of butter to flour means that it won’t amalgamate uniformly, so just ensure it is roughly combined with small pieces of butter remaining. Add the oats, brown sugar, spices and almonds (if using), rubbing the mixture together until incorporated. 

Once the fruit has softened, transfer to a shallow baking dish and spread evenly over the bottom. Top with the oat mixture and place the dish in the oven. Bake for 30-40 minutes, or until the oats have browned. Eat warm with a drizzle of cream or custard, or cold with unsweetened yoghurt.


IMG_2552

Filed under: Eat
comments 12

Making home: Objets d’art

We’ve been in our apartment for just over a year, but this place felt like home from Day One. There was just something about the warm timber floors, the airy spaciousness and streaming light that instantly gave us a sense of seclusion and comfort despite the chaotic city streets right outside. Owning it ourselves helped too, while purchasing new furniture and undertaking renovations (despite some disasters) enhanced the functionality, making it feel even more like our place.

Part of our enjoyment has to do with the design aesthetic we have explored here, a 60s-70s retro vibe that lends fun and funkiness to the space. The mid-century feel is most apparent in the colour palette we’ve used (burnt orange, dark brown, moss green and charcoal) but it can also be seen in much of the furniture which features clean Scandinavian-ish lines; even some Eames chairs (though only replicas, regrettably). It’s not a faithful reproduction of retro by any means, just a strong infusion that seems to marry well with other modern or rustic touches, like the glossy paint on the kitchen cupboards and the huge butchers block that dominates the kitchen.

Choosing new furniture took a considerable investment of time and money, but once the major work was done my attention turned to smaller things. Being in our fully furnished yet unmistakably incomplete apartment reminded me how much a sense of home is created by the accumulation of beloved objects: that pile of shells gathered at the beach while on holiday, the book given to you by your sister, the plant grown from a cutting in your grandmother’s house, and the vase that used to be in your father-in-law’s kitchen. I say that these are “my things” but it’s also true that they are me; repositories for my memories, constellations of family connections, and a partial reflection of who I am or who I want to be.

Having these objects in my living space would be a comfort, but most of my things are still in storage back in New Zealand. We keep putting off shipping them over, I’m not entirely sure why. Maybe it’s because there’s something so final about it. This collection of objects and paintings, in their 1×2 metre storage unit, are the last truly tangible evidence that NZ is home. And so they remain in limbo, gathering dust like hidden treasures.

The objects I have acquired in their place have been gathered over months, not years, but they already hold my memories. These are a few of my things; things that make my house a home.


Hornsea Pottery from the early 1960s. The small brown jug and mustard pot were found at a recycled store in Paddington. The large green coffee pot was found at a new antique store, Rare, in Montville during a recent excursion when Mum, Dad and Kerry were staying with us.


David Linton mango chopping board, bought in Maleny in Feb 2014 as our wedding anniversary gift to each other. Marimekko teapot, purchased as a personal congratulations for a major work achievement in 2013.


Misty brown glass tumblers that remind me of Nana and crystal champagne saucers that channel Mad Men. Both sets (of four each) found at the local Vinnie’s store for a pittance.

IMG_2479
Another Vinnie’s find – retro coffee pot set. It came with a lid-less sugar bowl, so I assume there was once a milk jug too. I use these cups all the time. It’s a rule for me – all treasures must be used, not stowed away or reserved for special occasions only. Not a hard rule to live by really, when I paid a total of $5 for this set.

IMG_2495
A bit more pricey, this piece, also from Wooloongabba Antique Centre. A serving dish in the shape of three sunflowers. The mark on the back reads “Made in California No. 6438”. Can anyone enlighten me as to its origins?

IMG_2500
Mum’s 1970s flour sifter, which somehow survived many garage sales and clean-outs over the years; set of old tart tins from Vinnie’s; and the measuring spoons I still use, from our first home in Ranui, with the tablespoon broken off and the half-teaspoon measure missing.

IMG_2623
Old Bushells coffee jar, found at Vinnie’s, filled with random teabags and sugar sachets in the manner of Kerry C; tin of jasmine tea from the Chinese grocer on the corner; green pottery jug, found while combing recycled stores with April this summer.

IMG_2442
Enamel tray featuring Still Life of Fruit, found at a recycled store in Paddington; two green mugs that remind me of everyone’s childhood, found at the local Red Cross store; the coffee plunger was a secret Santa gift from work last year; and the teaspoon might have just followed us here from our last apartment, not far from here.


Green glass plate, found at Wooloongabba Antique Centre in May 2013.

comments 8

Plum and Cinnamon Cake

IMG_2126

I wasn’t convinced by this cake, at first. It looked beautiful but my first slice was disappointing: too soft and too subtle to make any kind of impact. To be fair, I probably had unreasonably high expectations going in. It’s a Nigel Slater recipe, first and foremost, and Nigel seems to be universally revered throughout the food blogging world (e.g. see this post from Tea & Toast, this one from Spice Garden, or the entire blog, Letters to Nigel Slater). In fact, his reputation as the foodies foodie is so rock-solid that I can’t help feeling guilty, fraudulent and fundamentally incomplete because…I don’t own a single one of his books. There, I said it.

[The problem, if I can explain for a moment, is that my compulsive book-buying habits rarely extend to the purchase of brand new books. Second-hand bookstores are my favourite kind of haunt; I love the smell of old pages, the sight of books piled haphazardly on every surface, the sound of creaky floorboards, the hand-written signs, the slightly eccentric owners… But second-hand book-buying means that my collection grows haphazardly, driven by what happens to opportunistically find it’s way into my orbit. Although I have to wait for the cookbooks that everyone is talking about now, what’s not to love about finding classic Peter Gordon for $8, Nigella Lawson’s How to Eat for $4, or the iconic Moro for a measly $5! The thrill of unearthing such undervalued gems from amongst Women’s Weekly’s cookbooks from the ’70s and ten million soft-cover variations on Easy Italian/Chinese/Low-Fat Cuisine in 10/30/60 Minutes in Your Microwave, cannot be discounted. The problem is that I’ve never come across one of Nigel’s books. No-one wants to relinquish Nigel’s books – which is probably a sign that I should just suck it up and buy one already because they really are that good.]

This is a very long way of saying that I have no idea what Nigel himself said about this cake, so I can’t really blame him for my disappointment. However, he did originally call it a “Pudding Cake of Honey, Cinnamon and Plums”; an eloquent description, which had put me in the mind of warm, gooey, velvety goodness. The photos on Tim’s blog, where I first saw the recipe, seemed to promise a dark, dense cake that looked like sticky gingerbread, and Molly, another kitchen god/dess I follow, had also waxed lyrical about it, saying: “it’s dark and very tender – damp, as I once heard Nigella Lawson say….This isn’t the kind of cake that you reserve for company; it’s a Tuesday-night sweet. It’s also a Wednesday-afternoon, coming-in-from-the-rain sweet. It is also, if you’re open to it, a totally reasonable breakfast. I don’t like to use the word perfect, because I am fickle, but I’ll say it here. I think this cake is perfect.” It was because of such pedigree and praise that I was prepared, and expecting, to be bowled over at first bite.

IMG_2123

You know how some cakes just need a little time to develop, and how others are best eaten the day they are made? It’s hard to know which way a cake will go the first time around, but this is one that definitely benefits from an extra-long rest. Its dark, subtly spicy crumb needs 24 hours to deepen in flavour and densify in texture to live up to the luscious, pudding-like cake promised by Tim, Molly and probably Nigel. But when the time has passed, oh my, is it good! The three sugars provide a mellow, caramelly sweetness that takes me back to the golden-syrup steamed puddings of my childhood, but the cinnamon and plums lend a complexity and tartness that lift it right out of the nursery. It could be a pudding, served with cream or yoghurt, but it could just as easily be a mid-afternoon snack, eaten out of your hand while leaning against the kitchen bench. And it is this very thing that is crux of the matter: the real appeal of this cake is its ability to be simultaneously serious and comforting. Thank you Nigel; you are without doubt, a genius (…and I’ll buy a book really soon, I promise).

IMG_2101

Plum and Cinnamon Cake

Adapted slightly from Lottie + Doof’s version but originally from Nigel Slater’s Ripe

2 cups plain flour
1 slightly rounded tsp baking powder
1 tsp baking soda
1 1/2 tsp cinnamon
2/3 cup golden syrup
2 Tbsp mild runny honey
125g butter
1/2 cup (90g) brown sugar, lightly packed
500g ripe plums
2 large eggs
1 cup full cream milk

Preheat the oven to 180°C/350°F. Butter and flour a 25cm spring-form cake tin and lay a circle of baking paper on the bottom.

Wash the plums then cut them in half, removing the stones. If the plums are large, cut them into quarters. Set aside while you prepare the batter.

Sift the flour, baking powder, baking soda, and cinnamon into a large bowl and stir briefly with a whisk to combine.

Warm the golden syrup, honey, and butter in a small saucepan over a gentle heat until the butter melts. Stir in the brown sugar and set aside.

Break the eggs into a medium bowl, add the milk, and whisk together. Make a well in the centre of the dry ingredients, pour the golden syrup mixture into the well, and gently stir with a large spoon or spatula. Pour in the egg and milk mixture, and continue stirring until you have a loose, runny batter.

Pour the batter into the prepared tin. Arrange the plums over the top, cut side up, nestling them gently into the batter until they are half submerged. Place the tin in the oven and bake for 35 minutes. Place a piece of foil loosely over the top of the pan and cook for a further 15 minutes. Turn off the oven, but leave the cake inside for a further 15 minutes, then remove. Leave to cool in the tin for 10 minutes before removing from the tin.

Filed under: Eat